 how-to
Preventing Regrowth After Land Clearing: 7 Steps
Table of Contents
- How to Remove Heavy Brush: Start With the Right Method
- Why Preventing Regrowth After Land Clearing Fails Without a Plan
- Step 1: Treat Stumps and Roots Immediately
- Step 2: Apply the Best Herbicides for Brush Control
- Step 3: Preventing Soil Erosion After Clearing
- Step 4: Establish Ground Cover to Block Sunlight
- Step 5: Monitor for Invasive Species and Regrowth
- Step 6: Use Livestock or Mowing for Ongoing Management
- Frequently Asked Questions
Last Updated: September 8, 2026
How to Remove Heavy Brush: Start With the Right Method
Clearing heavy brush is only half the battle; preventing regrowth after land clearing requires a deliberate, multi-step strategy that begins the moment the vegetation comes down. This guide walks through the steps that separate a permanent clearing project from a temporary fix.
The most common mistake is treating clearing as a one-time event rather than a process. Effective preventing regrowth demands that you interrupt the plant's energy cycle, remove the food source stored in roots and stumps, and establish competitive vegetation that shades out new seedlings.
Why Preventing Regrowth After Land Clearing Fails Without a Plan
Most failed clearing projects share one trait: the landowner removed the visible growth and walked away. Preventing regrowth after land clearing is a systems problem, not a single task, and it fails when you skip the underground work.
Species like yaupon, greenbriar, and various hardwoods send up new shoots from intact root systems within weeks, often requiring more aggressive equipment and higher chemical volumes to bring under control a second time.
The Regrowth Cycle You Are Fighting
Many woody plants store significant energy reserves in their root systems. When you cut the top growth, that stored energy has no outlet, so the plant channels it into aggressive sprouting from the root crown and lateral roots.
Treatments applied while the plant is actively growing are far more effective than those applied during dormancy, because the herbicide moves through the plant's vascular system along with the sugars it is producing.
Step 1: Treat Stumps and Roots Immediately
Your window for easy stump treatment closes within hours of cutting. Applying a concentrated herbicide to the outer ring of the stump within 30 minutes of the cut allows the chemical to move down into the root system.
For larger stumps, mechanical removal may be the better route. Stump grinding physically eliminates the above-ground portion and much of the upper root mass, but grinding alone rarely kills the entire root system, so follow-up treatment of the surrounding soil is often necessary.
Step 2: Apply the Best Herbicides for Brush Control
Selecting the best herbicides for brush control depends on the species you are fighting, the season, and your tolerance for environmental trade-offs. The real decision hinges on cost per acre, residual soil activity, and proximity to water or desirable vegetation.
Comparing Active Ingredients by Trade-Off
Three active ingredients dominate the market for woody brush control, and each carries a distinct profile:
- Triclopyr (sold as Garlon, Remedy Ultra, or Brush Killer) is the workhorse for mixed brush. It is selective, targeting broadleaf plants and woody stems while leaving grasses largely unharmed, making it the default choice for pasture maintenance. Its soil half-life is typically 30 to 90 days, allowing for re-seeding within a season (PubMed).
- Glyphosate (sold as Roundup or Accord) is non-selective and kills everything it touches. It is effective and inexpensive, but its reputation has made it a liability near waterways or where native plantings are planned. Many land managers now avoid it on erosion-prone slopes because bare soil from a non-selective kill invites invasive weed seed germination.
- Imazapyr (sold as Arsenal or Chopper) is the heavy-duty option for deep-rooted species like yaupon or Chinese tallow. It is highly effective but has significant residual soil activity, up to several months, which can damage desirable hardwoods. It is best reserved for spot treatment or total-vegetation control along fence lines, not broadcast application.
The Cost-Benefit Reality Most Guides Skip
Chemical control is the cheapest upfront option but the most expensive over a five-year horizon if you have to re-treat. Mechanical removal costs two to three times more per acre initially but removes the root crown that drives resprouting. Biological control through livestock has the lowest annual cost on large acreage but requires years of consistent grazing pressure.
Most practitioners find that a hybrid approach wins on total cost: mechanical clearing to remove the bulk of the biomass, followed by a targeted cut-stump or basal bark treatment on the remaining stumps, then a single foliar pass on regrowth the following spring.
Regulatory and Permitting Considerations
Before you mix a single tank, check whether your state requires a pesticide applicator license for the products you plan to use. Many restricted-use herbicides, including some formulations of triclopyr and imazapyr, require a certified applicator. The EPA's label requirements under FIFRA carry the force of law; applying a product off-label or near a protected waterway can result in fines.
If your property borders a stream, wetland, or drainage ditch, you may fall under the Clean Water Act's permitting requirements. The U.S. Army Corps of Engineers regulates activities that disturb wetlands, and some states have additional buffer zone restrictions on herbicide application near water. A quick call to your local USDA Natural Resources Conservation Service office or county extension agent can clarify whether your project triggers any of these requirements.
Application Mechanics That Determine Success
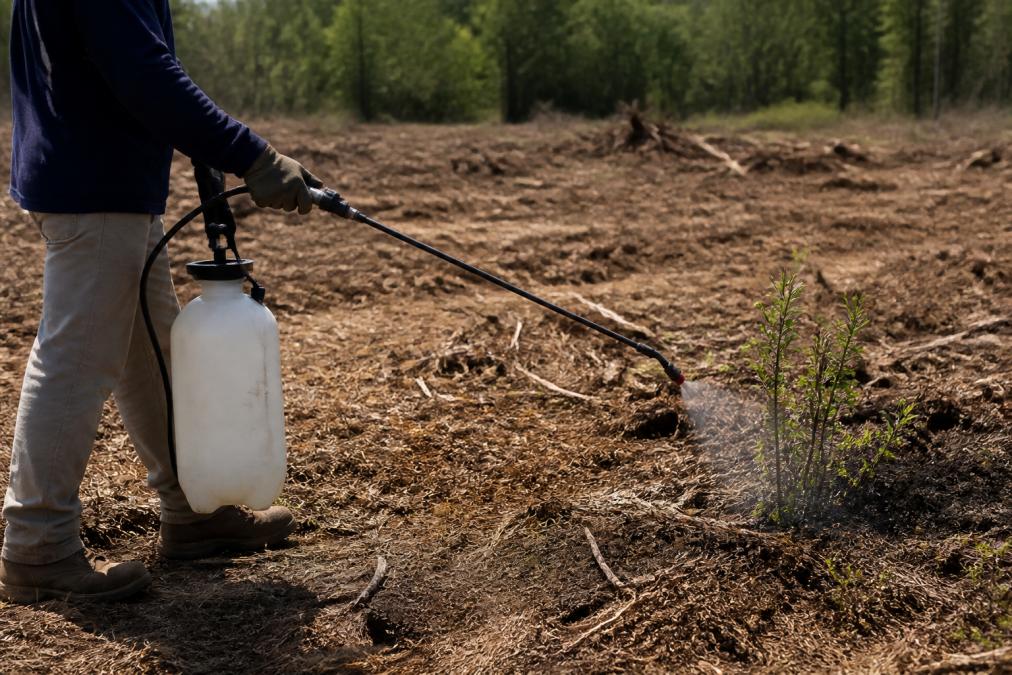
Application method matters as much as the chemical choice. A foliar spray coats the leaves of young regrowth and is best used when plants are actively growing. Basal bark treatment applies a mixture of herbicide and oil to the lower 12 to 18 inches of the trunk of standing woody plants, which is effective during the dormant season. Cut stump treatment, as covered in Step 1, is the most targeted and lowest-volume method.
| Treatment Method | Best Timing | Target Vegetation | Key Consideration |
|---|---|---|---|
| Foliar spray | Active growth (spring/summer) | Young regrowth, brush | Requires thorough leaf coverage; avoid drift |
| Basal bark treatment | Dormant season (winter) | Standing woody stems | Oil-based carrier needed; effective on stems under 6 inches diameter |
| Cut stump treatment | Immediately after cutting | Freshly cut stumps | Most effective within 30 minutes |
| Stump grinding | Any time | Large stumps | Reduces but does not eliminate root sprouting |
For foliar applications, a non-ionic surfactant at the rate specified on the label improves penetration of waxy leaves. For basal bark work, the oil carrier must be labeled for that use, diesel fuel is a common carrier but carries its own environmental and fire-safety concerns. Most practitioners prefer a commercial basal oil product with a higher flash point.
Reading the Label for Environmental Protection
The label is not a suggestion; it is a legal document. It specifies the maximum application rate, the required personal protective equipment, the re-entry interval, and any restrictions on application near water or on slopes. Applying a product to a species not listed on the label is an off-label use that voids your liability protection.
For properties near sensitive areas, look for products with the EPA's "reduced risk" designation or consider mechanical methods exclusively. The most defensible approach on sensitive sites is to skip broadcast spraying altogether and rely on cut stump treatments, targeted basal bark applications, and competitive planting.
Step 3: Preventing Soil Erosion After Clearing
Bare, disturbed soil is highly vulnerable to erosion, and preventing soil erosion after clearing is critical for keeping your topsoil in place. The weight of clearing equipment compacts soil, which reduces water infiltration and increases runoff.
The fix is to re-establish a protective cover quickly. Erosion control blankets or straw mulch provide immediate protection on slopes while slower-growing vegetation establishes. On flatter ground, a fast-growing annual grass can hold the soil during the first season.
USDA Natural Resources Conservation Service guidance on erosion control after land disturbance recommends establishing temporary vegetation on disturbed sites as soon as possible to prevent topsoil loss. The agency notes that leaving soil bare, even for a single season, can result in significant sediment movement during heavy rain events.
Step 4: Establish Ground Cover to Block Sunlight
The most sustainable way to suppress regrowth is to outcompete it. Preventing regrowth after land clearing succeeds long-term when you establish dense ground cover that blocks sunlight from reaching the soil surface. The critical question is not just that you should plant, it is what you should plant to create a plant community that naturally suppresses brush for decades.
The Native Restoration Advantage
Most generic advice recommends a fast-growing annual grass or a commercial pasture mix. That approach stabilizes soil in the short term but leaves a biological vacuum that invasive brush species are perfectly adapted to fill. Native plant restoration establishes a permanent, self-sustaining plant community that leaves no ecological niche for invaders.
Native warm-season grasses are the single best tool for this job on most cleared sites. Species like switchgrass (Panicum virgatum), big bluestem (Andropogon gerardii), and little bluestem (Schizachyrium scoparium) develop root systems that extend six to ten feet deep. That root mass holds soil against erosion and exhausts soil moisture and nutrients so thoroughly that woody seedlings cannot establish.
For properties where you want a mix of grasses and forbs, for wildlife habitat, pollinator support, or aesthetic value, add native wildflowers and legumes that fill the understory without competing with the grass sod. Species like purple prairie clover (Dalea purpurea), Illinois bundleflower (Desmanthus illinoensis), and black-eyed Susan (Rudbeckia hirta) provide nectar sources and seed for wildlife.
Matching Species to Your Land Use
| Land Use | Recommended Species Mix | Establishment Window | Key Benefit |
|---|---|---|---|
| Pasture or hay ground | Tall fescue, orchardgrass, or bermudagrass (depending on region) | Spring or late summer | Dense sod crowds out brush; supports grazing |
| Wildlife habitat or food plots | Native warm-season grasses + forbs (switchgrass, big bluestem, partridge pea) | Late spring after soil warms | Deep roots suppress brush; provides cover and food |
| Erosion-prone slopes | Annual ryegrass or cereal rye as a nurse crop + native perennials | Early fall or early spring | Nurse crop holds soil while perennials establish |
| Woodland edges or transition zones | Native shade-tolerant grasses and sedges | Fall dormant seeding | Creates a natural buffer that shades out invasive seedlings |
The Nurse Crop Strategy
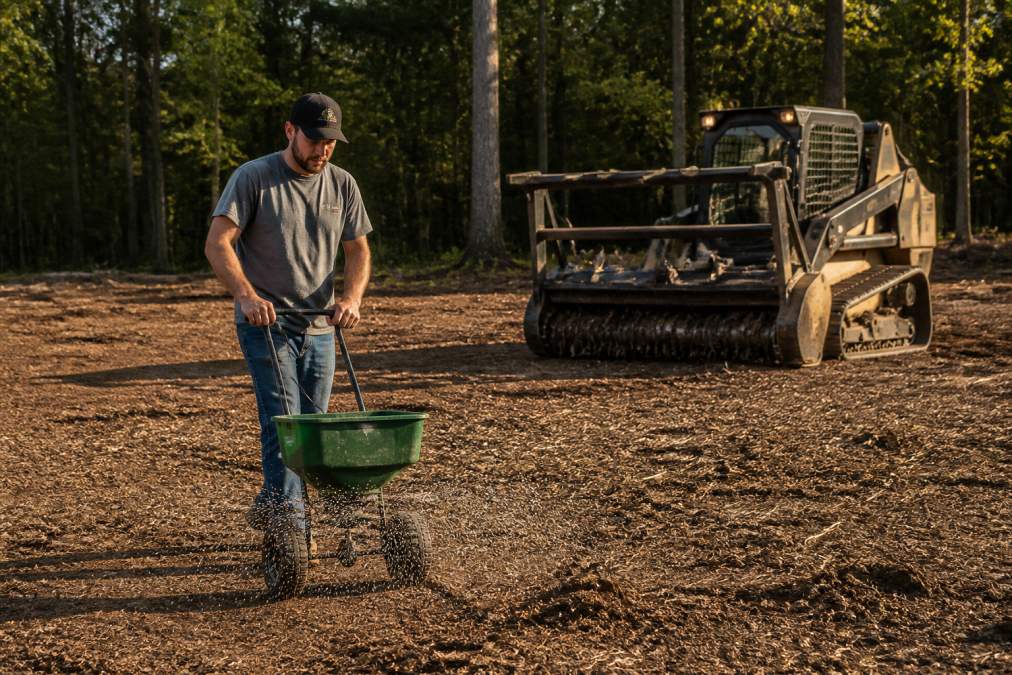
A nurse crop is a fast-growing annual, typically cereal rye (Secale cereale) or annual ryegrass, that germinates within days of seeding and provides immediate soil cover. It holds the soil during the critical first months while the slower-growing native perennials establish their root systems below. By the second season, the nurse crop dies back naturally.
This approach solves the timing problem that plagues many clearing projects. Bare soil is most vulnerable in the first 60 to 90 days after clearing, but native grasses can take a full season to establish visible top growth.
Seeding Rates and Timing That Work
Native grass seeding rates vary by species and method. A general range for drilled seeding is 8 to 12 pounds of pure live seed (PLS) per acre for switchgrass or big bluestem, while broadcast seeding requires roughly double that rate. Always check the seed tag and calculate PLS before ordering.
Timing is region-specific but follows a clear pattern. In the Southeast and mid-Atlantic, late spring (April through June) is the optimal window for warm-season native grasses, as soil temperatures need to reach 60 to 65 degrees Fahrenheit for germination. In the Midwest and Northern states, the window shifts to late May through mid-June. Dormant-season seeding, done in late fall or early winter after soil temperatures drop below 50 degrees, allows seed to stratify naturally but requires higher seeding rates.
Sourcing Native Seed
Native seed must be sourced from a regional ecotype, seed collected from plants native to your specific area, to ensure it is adapted to your local climate and soil conditions. Many state departments of natural resources maintain lists of certified native seed vendors.
A common mistake is purchasing cheap "wildflower mix" or "conservation mix" from a big-box store without checking the species composition. These mixes often contain aggressive non-native species. A reputable native seed vendor will provide a seed tag listing the species, origin, and PLS for each component.
What to Expect in the First Two Seasons
The first season after seeding native grasses is often discouraging. Top growth is sparse, and weeds may dominate the visual landscape. This is normal, native grasses allocate most of their energy to root development in year one. By year three, a well-established stand is dense enough to suppress most woody seedling establishment.
The Long-Term Payoff
A native grass and forb planting is not just erosion control, it is a permanent biological barrier to brush regrowth. Unlike a fescue pasture that requires annual fertilization and mowing, a native planting becomes self-sustaining after the establishment period, requiring only periodic prescribed burning or targeted spot treatment.
Step 5: Monitor for Invasive Species and Regrowth
No clearing project is truly finished. Walk the property every three to four weeks during the first two growing seasons, looking for sprouts emerging from root systems and for new seedlings establishing in bare patches.
Pay particular attention to identifying invasive species versus native regrowth. Invasive species like Chinese privet or Japanese honeysuckle require aggressive removal. Spot-treating small infestations with a foliar spray or hand-pulling is far easier than dealing with a large-scale invasion later.
Do not assume that all regrowth is bad. Native grasses and beneficial forbs returning to a cleared site are signs of a healthy recovery. Indiscriminately spraying all new growth will create bare soil and invite worse weed problems.
Step 6: Use Livestock or Mowing for Ongoing Management
For larger properties, integrating livestock is one of the most effective ongoing management tools. Goats and sheep browse woody vegetation and will keep brush suppressed on cleared ground, while cattle can help maintain grass-dominated pasture. Rotational grazing prevents overgrazing of desirable species.
Where livestock are not an option, mowing every six to eight weeks during the growing season prevents woody seedlings from establishing a strong root system. Consistent mowing depletes the energy reserves of resprouting species.
Texas A&M AgriLife Extension resources on brush management and livestock integration provides region-specific guidance on stocking rates and grazing strategies for vegetation management. Their materials note that sustained grazing pressure is required to exhaust the root reserves of established brush species.
A property that is cleared, seeded with competitive ground cover, and then managed with livestock or periodic mowing will require far less chemical intervention in future years.
The challenge of keeping brush from returning is ongoing, but it is manageable with the right sequence of treatments. At SemperFi Land Clearing LLC, we handle the heavy work of clearing and forestry mulching. Our veteran-owned team offers free land assessments to evaluate your property and recommend a regrowth prevention strategy tailored to your goals. Get an estimate and start your project with a plan that keeps your land clear for good.
Frequently Asked Questions
What is the best way to kill tree stumps to prevent regrowth?
The most effective method is to cut the stump low to the ground and immediately apply a concentrated herbicide like triclopyr to the outer edge of the cut surface. This is called stump treatment. For preventing regrowth after land clearing, this step is critical, as it stops the root system from sending up new shoots. Apply the chemical within 30 minutes of cutting for maximum absorption.
Should I use herbicides after forestry mulching?
Yes, in most cases. Forestry mulching grinds vegetation into ground cover, but it does not kill the root systems of aggressive species. A follow-up foliar spray or basal bark treatment with a selective herbicide is often necessary to prevent regrowth after land clearing. Timing matters: apply the herbicide when new growth reaches 6 to 12 inches tall for the best results.
How does soil erosion affect regrowth after land clearing?
Erosion removes the topsoil that holds seeds and supports new plant growth. When the soil is unstable, weeds and invasive species with shallow root systems often move in first, creating a new regrowth problem. Preventing soil erosion after clearing with erosion blankets or fast-growing ground cover helps you control what grows back, rather than letting nature decide.
What is the best way to clear an overgrown field?
For thick brush, a forestry mulcher is the most efficient tool because it grinds vegetation into mulch in a single pass. For lighter overgrowth, a brush hog or mower may work. After clearing, you must address the roots and seed bank to prevent regrowth after land clearing. This means treating stumps, applying herbicides, and establishing ground cover.