 how-to
Land Clearing Soil Erosion Prevention: 7 Proven Steps
Table of Contents
- Why Land Clearing Triggers Soil Erosion
- Step 1: Test Your Soil Before You Cut Anything
- Step 2: Time Your Clearing Around Wet Season Protocols
- Step 3: How to Remove Heavy Brush Without Stripping Topsoil
- Step 4: Silt Fence Installation Guide for Runoff Management
- Step 5: Mulching, Ground Cover, and Erosion Control Blankets
- Step 6: The Best Ground Cover After Land Clearing
- Step 7: Permits, Inspections, and Long-Term Maintenance
- Frequently Asked Questions
Last Updated: September 13, 2026
Why Land Clearing Triggers Soil Erosion
Strip vegetation off a slope and you remove the best erosion control system the land had. Land clearing soil erosion prevention starts with understanding that bare dirt is unstable dirt: the roots, litter, and canopy you removed were doing structural work.
Soil erosion is the detachment and transport of topsoil particles by water or wind once the protective cover is gone. On a freshly cleared site, rain that once soaked in or dripped off leaves now hits bare ground at full force, dislodging particles that sheet flow carries downhill.
The USDA Natural Resources Conservation Service guidance on erosion treats ground cover as the primary defense against this process. Lose the cover, and you lose topsoil faster than it can rebuild.
On overgrown East Texas acreage, the moment a dozer blade scrapes a slope bare, the clock starts ticking. The seven steps below are a sequence landowners can consider before equipment rolls.
How Exposed Soil Loses Its Structure
Raindrops strike bare soil like tiny hammers, breaking aggregates apart and sealing the surface. Once that crust forms, water runs off instead of soaking in, carrying the loosest particles with it.
Roots hold soil in place mechanically; remove vegetation and slope stability drops. Compaction from heavy equipment squeezes out the pore space that lets water infiltrate, so you get more runoff, more sediment in ditches, and a muddier site after every storm.
Step 1: Test Your Soil Before You Cut Anything
Test first, clear second. A basic soil test tells you texture, pH, and organic matter, how erodible your ground is and what will grow back on it.
Most guides skip this step, which is a mistake. Sandy soils wash away far faster than clay-heavy ground, and high-organic-matter soil recovers faster. Knowing your composition tells you how aggressive your erosion control must be before you spend a dollar.
A county extension office can run a standard test, usually back within a couple of weeks. Collect samples from several spots, not one hole near the driveway, and sample by zone on larger clearings so steep, fragile areas get treated differently from flat, stable ones.
Step 2: Time Your Clearing Around Wet Season Protocols
Clear in dry conditions whenever the schedule allows. Working wet ground destroys structure, ruts the surface, and turns every tire track into a runoff channel.
Wet season protocols exist because saturated soil compacts under equipment weight and loses the porosity that lets water infiltrate. Disturbed ground in wet months also exposes bare soil to the year's heaviest rain, when erosion potential peaks.
If you must work in a wet window, keep the exposed area small and stabilize it the same day. Clear in strips, leave buffer vegetation along drainage patterns, and never leave a large bare slope open through a storm cycle.
Step 3: How to Remove Heavy Brush Without Stripping Topsoil
Removing heavy brush is a soil preservation job disguised as a vegetation job. Your technique decides whether you keep topsoil or push it into a burn pile.
The biggest mistake is treating topsoil like debris. That dark upper layer took centuries to build and is the foundation of everything you want to grow later; scraping it off and mixing it into subsoil sets a property back years.
Forestry Mulching vs. Bulldozing for Slope Stability
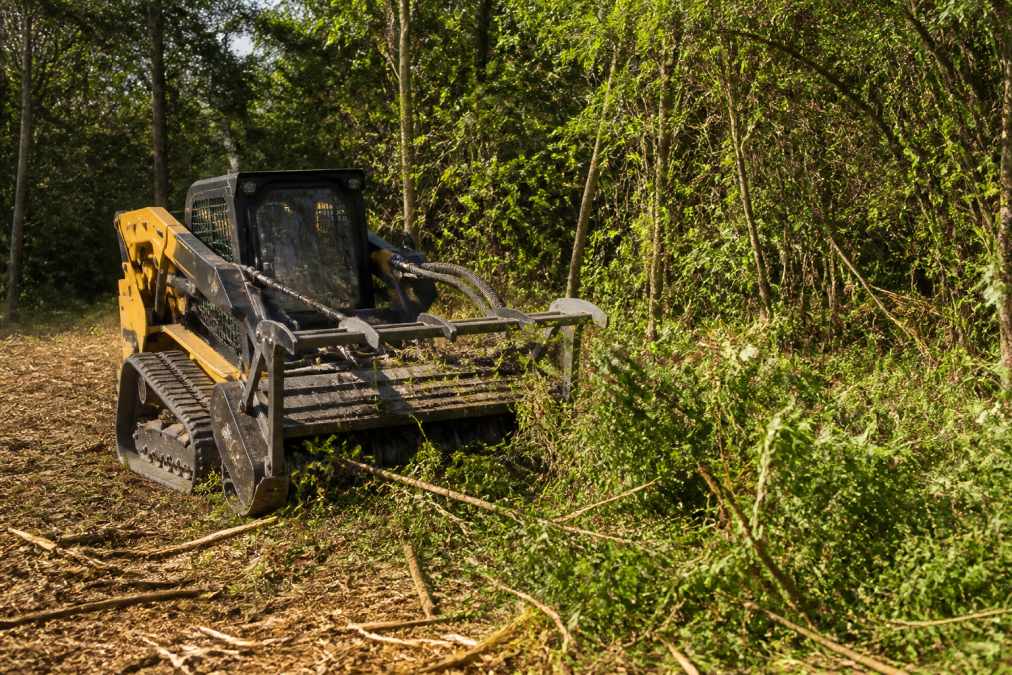
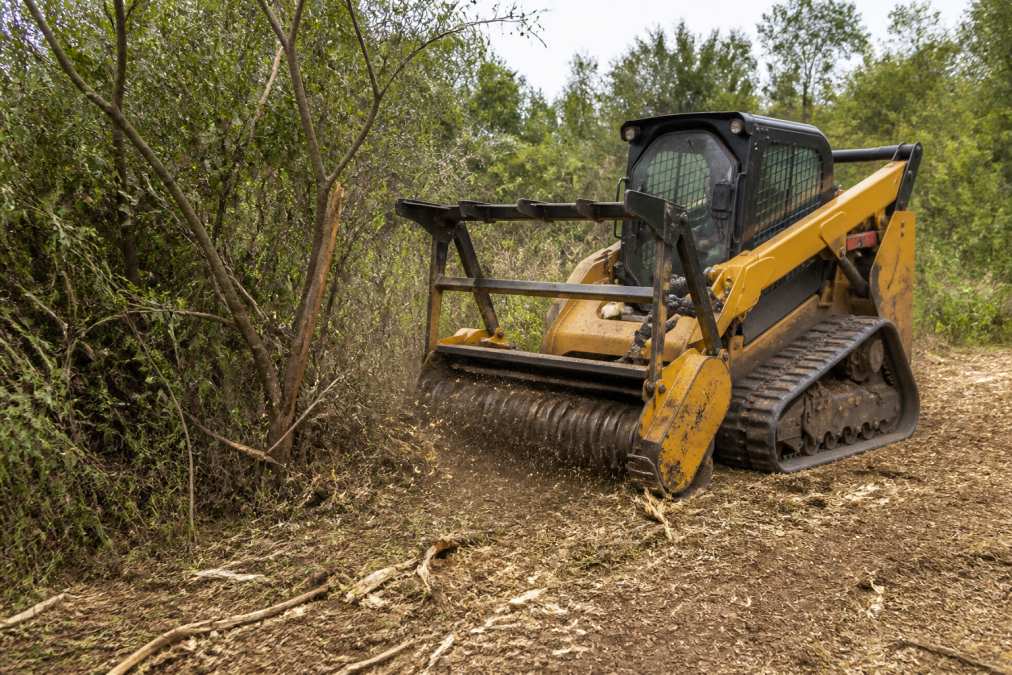
Forestry mulching grinds standing brush and small trees in place, leaving a mat of shredded material that shields the soil, slows runoff, and feeds microbial life. Bulldozing pushes everything into piles, scrapes the ground bare, and compacts what is left, on slopes, the difference in slope stability is not subtle.
| Method | Effect on Topsoil | Slope Stability | Best For |
|---|---|---|---|
| Forestry mulching | Retains and covers it | High, mulch armors surface | Brush, fence lines, slopes |
| Bulldozing | Often strips and mixes it | Lower, bare compacted ground | Stumps, level building pads |
For most overgrown residential and hunting properties, mulching is the better first pass. Save the blade for stumps and the actual building footprint.
Step 4: Silt Fence Installation Guide for Runoff Management
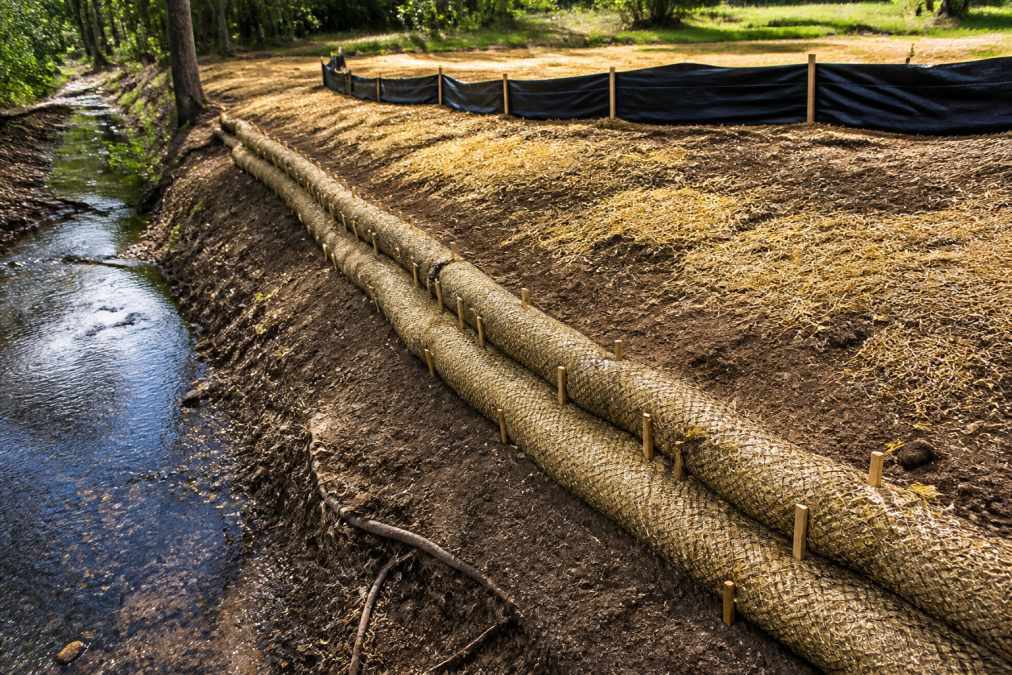
A silt fence is a temporary sediment barrier that traps soil particles while letting water filter through. Install it before you clear, not after the first muddy rain.
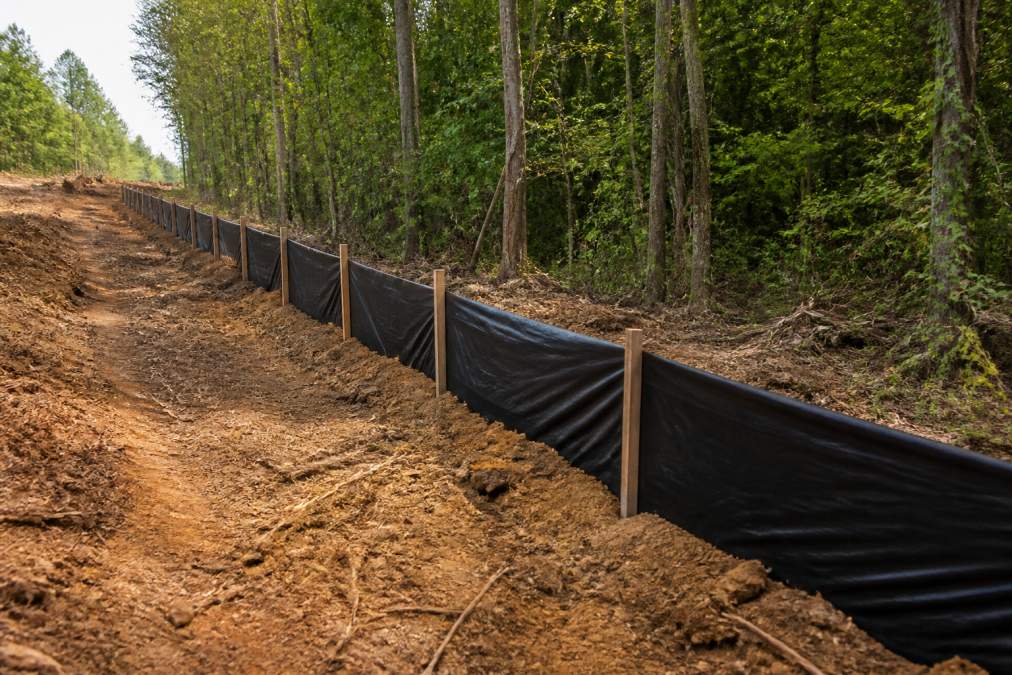
Here is the installation sequence that actually works:
- Mark the downslope perimeter of the disturbed area, following the contour rather than a straight line.
- Cut a trench about 15 to 20 centimeters deep along that line.
- Set the posts on the downhill side, driven deep enough to hold under saturated soil.
- Unroll the fabric and press its bottom edge into the trench.
- Backfill and compact the trench so water cannot tunnel underneath.
- Inspect after every storm and repair sagging or undercut sections.
The EPA guidance on construction stormwater and sediment controls is clear that sediment barriers only work when they are keyed into the ground and maintained. A fence that water runs under is decoration.
Where to Place Silt Fences and Sediment Basins
Run silt fencing along the downslope edge of every disturbed area, never across a concentrated flow path where water will blow it out. Where runoff concentrates, use a sediment basin instead: a dug depression that slows water long enough for particles to settle before it leaves the site.
Place basins at the low point where channels converge, sized for your largest expected storm, and pair them with check dams in temporary ditches so water arrives slow instead of fast.
Step 5: Mulching, Ground Cover, and Erosion Control Blankets
Mulch is the cheapest erosion insurance you can buy, but "add mulch" is where most guides stop. The real decision is which cover to use, on what slope, and at what cost per square foot over its service life, the part that decides whether your slope holds through the first spring storm cycle.
Shredded material or straw absorbs raindrop impact and holds soil particles while new growth establishes, and loose cover works well on gentle grades. Once the slope steepens, loose mulch slides and washes into concentrated flow paths, that is when you need a manufactured blanket.
Matching Cover Type to Slope and Site Conditions
Slope angle is the first filter. A common rule of thumb is that loose straw or shredded mulch holds on grades up to roughly 3:1 (about 33 percent) if crimped or tackified. Steeper than that, you are gambling on the next storm; blankets and mats are engineered for steeper ground, and fiber type determines how long they last.
- Straw blankets (typically photodegradable netting): Fast to install, inexpensive, and designed to break down in roughly 3 to 6 months. Best for gentle to moderate slopes where you just need short-term protection while seed germinates.
- Coconut coir blankets: Slower to degrade, often lasting 12 to 24 months or more, and better on steep or high-flow slopes where you need protection across two growing seasons. Heavier and more expensive per square foot.
- Straw-coconut blends: A middle option that gives faster initial cover with longer durability than straw alone.
- Synthetic turf reinforcement mats (TRMs): Permanent, high-tensile mats for channels and very steep slopes where vegetation alone will not hold. Highest cost, longest life.
Cost and Durability Trade-Offs
Pricing varies by region, supplier, and roll size, so treat any figure as a planning range rather than a quote. What matters is the relationship between cost, service life, and the consequence of failure.
| Cover type | Relative material cost | Typical service life | Best use |
|---|---|---|---|
| Straw mulch (crimped or tackified) | Lowest | One season | Gentle slopes, large flat areas |
| Straw blanket | Low to moderate | 3-6 months | Moderate slopes, temporary cover |
| Straw-coconut blend | Moderate | 6-12 months | Moderate to steep slopes |
| Coconut coir blanket | Moderate to high | 12-24+ months | Steep slopes, longer establishment windows |
| Synthetic TRM | Highest | Multi-year/permanent | Channels, extreme slopes |
| Hydroseeding (seed + mulch + tackifier) | Moderate | One season, then living cover | Large or awkward slopes, hard-to-reach areas |
The cheapest option is not always the lowest total cost. If a straw blanket fails in month four and you have to re-install, you have paid twice and lost topsoil in between. On a steep slope with a long establishment window, the coir blanket that lasts two seasons is often cheaper per year of protection than two rounds of straw.
Hydroseeding and Anchoring Details
Hydroseeding applies a slurry of seed, mulch, and tackifier in one pass, fast and effective on large or awkward slopes where hand spreading is impractical. It still needs surface preparation and, on steep ground, a companion blanket or mat to keep the slurry from sliding before it cures.
Whichever cover you choose, anchoring makes it work. Blankets are stapled at the top of the slope, along the edges, and in a grid across the face, with extra staples in channels or depressions. Loose mulch must be crimped, tackified, or netted so wind and sheet flow cannot move it, cover without anchoring is debris waiting for the first hard rain.
Step 6: The Best Ground Cover After Land Clearing
The best ground cover after land clearing is a fast-establishing mix of native grasses and deep-rooted species suited to your soil and sun. Native grasses build the root mass that holds soil long term.
Re-vegetation is the finish line for erosion control. Everything before this step is temporary. The permanent fix is living roots.
Choose species that match your site. Native warm-season grasses establish deep roots that reinforce soil far better than shallow-rooted turf. Add a quick-growing nurse crop for first-season cover while perennials establish, and on pasture or food plot ground a legume can add nitrogen while it holds soil.
Seed into a prepared surface, not compacted ruts. Lightly cover the seed and keep it moist through germination; if you cleared in dry conditions and stabilized with mulch, your seed already has a head start.
Step 7: Permits, Inspections, and Long-Term Maintenance
Erosion control is not finished when the seed goes down, it is finished when vegetation is established and holding, which takes a full growing season or more. Two things decide whether you get there: legal compliance and actual maintenance of the controls you installed.
Regulatory Compliance and Erosion Control Plans
Land clearing that disturbs ground is regulated at multiple levels, and the rules stack. Federally, the Clean Water Act's stormwater permitting program, administered through the EPA's National Pollutant Discharge Elimination System (NPDES), requires construction stormwater coverage when a project disturbs one acre or more, or is part of a larger common plan exceeding one acre (the EPA). That coverage typically requires a Stormwater Pollution Prevention Plan (SWPPP) describing your erosion and sediment controls, inspection schedule, and recordkeeping.
Below the federal threshold, states, counties, and municipalities layer on their own requirements. Many require a separate sediment and erosion control plan, grading permit, or land disturbance permit once clearing passes a set area, sometimes well under an acre. Some impose buffers near streams, wetlands, or steep slopes, and some require a certified plan from a qualified professional.
Because thresholds and forms vary by jurisdiction, contact your local permitting or environmental office before equipment arrives and ask three questions: Does my project need a permit, what plan documents are required, and what inspections are expected? Getting this wrong can mean stop-work orders, fines, and mandatory restoration, so confirm the rules for your site rather than assuming a small clearing is exempt.
A 6-12 Month Maintenance Schedule
Most guides stop at installation. The controls only work if someone inspects and repairs them, and the first year after clearing is when failures show up. A simple schedule keeps the site compliant and keeps topsoil on the property.
Weeks 1-4 (immediately after clearing):
- Inspect silt fence and sediment barriers after every significant rain, and at least weekly.
- Repair any sagging fabric, undercut sections, or posts that have pulled loose.
- Confirm blankets and mats are still anchored; re-staple any lifted edges.
- Clear accumulated sediment from basins and check dams before they fill to half capacity.
Months 2-3 (early establishment):
- Check seed germination and re-seed any bare or thin patches before they widen.
- Look for rills starting to cut on slopes; fill and re-cover them immediately.
- Verify that runoff is still flowing to your intended outlets and not tunneling under barriers.
Months 4-6 (mid-season):
- Re-inspect after the heaviest rain events of the season.
- Remove sediment from basins and dispose of it where it will not wash back in.
- Assess whether straw blankets are degrading faster than the vegetation is establishing; if so, plan a second application or upgrade to a longer-life cover.
Months 7-12 (vegetation take-over):
- Confirm ground cover is dense enough to protect the soil on its own before removing temporary controls.
- Remove temporary barriers only after vegetation is established, and do it in stages so you never leave a large bare area exposed.
- Re-seed or overseed thin areas going into the next dormant season.
- Document inspections and repairs if your permit requires recordkeeping.
A short walk after every significant rain costs an hour and prevents gullies that cost thousands to fix. The pattern is always the same: a small rill becomes a channel, a channel becomes a washout, and the topsoil you worked to save ends up in the ditch.
Frequently Asked Questions
What is the best way to prevent soil erosion after clearing land?
Start by testing your soil and timing the work outside wet season protocols. Keep as much vegetation retention as possible, install silt fences and sediment basins before clearing begins, and cover exposed soil with mulch, erosion control blankets, or native grasses within days, not weeks. Forestry mulching leaves root systems and a mulch layer in place, which holds topsoil far better than bulldozing. Re-vegetating quickly is the single most effective long-term step.
How does land clearing contribute to soil erosion?
Removing trees and brush exposes soil to rain impact and surface runoff that roots and ground cover once absorbed. Without that protection, topsoil washes away, drainage patterns shift, and slope stability drops. Compaction from heavy equipment makes it worse by reducing how fast water soaks in. The result is more sediment leaving your property, poorer water quality downstream, and ground that struggles to grow anything back.
Do I need a permit for erosion control during land clearing?
It depends on your acreage, slope, and proximity to waterways. Many states and counties require a stormwater management plan or a sediment and erosion control permit once disturbed area passes a set threshold, often one acre. Some jurisdictions also require a certified inspector for silt fence installation. Check with your county planning office before you clear, and ask whether a site grading plan is needed.
How long does it take for soil to stabilize after clearing?
Bare soil can start moving within the first heavy rain, so temporary measures like silt fences and mulch should go in before clearing starts. Full stabilization with native grasses and ground cover usually takes one to two growing seasons, depending on slope angle, soil type, and rainfall. Long-term maintenance schedules matter here: inspect silt fences and reseed bare patches after every major storm until vegetation is fully established.